Showing posts with label review. Show all posts

Wednesday, January 22, 2014

Birds At Sunset (Messy Mansion MM14 Plate Review)

Hello Lacquer Luvers! I'm back with another Messy Mansion stamping plate review for you today. This time I'm using MM14, otherwise known as "the bird plate." As you can see in the photo below, this stamping plate is full of bird, cage, and feather images that are all very cool!


I really love the birds on the wire image in the middle of the plate and decided to test it out for this review. I searched Google images and found this picture of birds on a wire at sunset. I was so inspired by it and got excited at the idea of turning my tiny canvases into a replica of this gorgeous photo. 


This manicure began with my base colors, 2 coats of Zoya Pixie Dust Beatrix & 1 coat of Cult Nails Tempest. I then got out an army of Zoya colors: Darcy, America, Micky, Yummy, Perrie & Lael. I used the tips of makeup sponges to create the look of the sky. Various colors were layered over one another to create a nice blend.


Once my colorful sunset was dry, I used Konad Special Stamping Polish in black to pick up the image onto my stamper. Working very quickly, I used the end of a toothpick to scrape off some of the image. This left me with two wires instead of seven and I quickly stamped them onto my nails. Part of the wire didn't transfer over (this was user error from me taking longer than I should've to get the image on my nail) so I just used a striper brush to fill that in. This manicure was complete with a coat of HKGirl topcoat.


Messy Mansion plate MM14 is spectacular! I'm really happy to have this one in my collection because the images are all great and generously sized to fit anyone's nails. These plates retail at $7 and can be purchased at http://www.messymansion.com.au/. Make sure to check out the other plates on Messy Mansion's site as I'm sure you'll find many that would be great additions to your stamping collections! As always, I hope you all enjoyed this post my dear Lacquer Luvers and I look forward to sharing my next post with you, xo!

~Jessica

Sunday, September 22, 2013

Laquerlicious Caramelized Apples & Glamorously Sassy

Hello Lacquer Luvers! I hope everyone is having a fabulous weekend so far. Today we transition into a new season and with that comes new polishes! I'm really excited to share one of those with you today as well as another very fun polish that I'm sure you guys are going to fall in love with. I have had the honor to review 4 beautiful artisan polishes created by the lovely Michelle of Laquerlicious and believe me when I tell you, all the great things you have ever heard about this line are indeed true! 

The first manicure I would like to share with you guys features one of the best glitter bombs ever created (in my humble opinion, of course)! I wanted to use a base color that would not only make every single glitter found in this baby pop, but also had the ability to bring this mani full circle with its name. I needed something glamorously sassy and Bettina Fruit Punch was just screaming at me. Fruit Punch is a stunning fuchsia cream with the most beautiful pink shimmer throughout. It's girly, flashy and every bit of sassy! I applied 2 coats of it over Essie Feed Me.


Once Fruit Punch dried I proceeded to apply one coat of Laquerlicious Glamorously Sassy. As you can see, this clear base polish is jam packed with an amazing variety of glitter. There is everything from grey, yellow, green, orange and white matte glitter in hex, square and circle shapes. There are also pink and light pink stars, metallic purple micro glitter and XL silver and pink hologram glitter. Glamorously Sassy is part of the All Things Diva Collection.


Glamorously Sassy has a great formula. The clear base is not at all thick or goopy and the brush was all I used to get perfect placement of all the glitters. I didn't manage to pick up any of the larger circles, however. Next time I wear this beauty I'll probably use a toothpick to fish for those. As you can see in the pictures above, this polish is equally as stunning with a glossy (Glisten & Glow HK Girl) or matte (Hard Candy Matte-ly In Love) topcoat (I personally LOVE how much the glitters pop with the matte).


Next up is one of Laquerlicious' Fall Is In The Air polishes. Caramelized Apples is probably the most unique glitter polish I've ever seen for fall. This is a beautiful reddish brown base that has tiny multicilored glitter and multi sized circle glitter that are gold, green and red.


I applied a base of Essie Feed Me to begin this manicure followed by 2 coats of Laquerlicious Caramelized Apples. Application was smooth and the formula was great! Again, no glitter placement with this polish but the larger glitters didn't come out with the brush. I applied 1 coat of HK Girl topcoat to smooth out the glitter and give it a glossy shine. 


The caramel apple on my accent nail was created with the stamping decal method. First I applied 3 coats of Essie Topless & Barefoot and stamped the squiggly image from Konad M70 using Zoya Louise. Next I put a tiny bit of HK Girl on a sandwich baggy. Once that dried, I stamped the apple from BornPrettyStore's M66 image plate and used Zoya's Elisa, Louise and Hunter.


Laquerlicious polishes are available for purchase in her shop on Etsy and retail for $9.50 on average. Michelle also has a collection of polishes whose proceeds benefit the Fresno Bully Rescue in Fresno, California. FBR is a nonprofit organization that rescues pitbull and pitbull like breeds. I admire her so much for giving to these animals in a selfless and creative way. You can purchase Laquerlicious nail polish by clicking on this link. Make sure you guys give her a follow on instagram as well @creativenailchick. As always I hope you all enjoyed this post my dear Lacquer Luvers and I look forward to sharing my next post with you, xo!

~Jessica

**These polishes were sent to me for my honest review. **

Thursday, September 19, 2013

U-Spicy UV Lamp Review

Hello Lacquer Luvers! I am really excited for today's post as it is a little different than the usual LuvMyLacquer nail posts. Today I had the opportunity to put my gel manicure skills to the test and I'm super happy with the results. If you are seeking advice and recommendations on how to get that perfect salon gel manicure at home, you're in luck today!


We all know that the main difference between a polish and gel manicure is the use of an ultraviolet lamp. These lamps help to cure the gel and bond it to your natural nail, allowing your manicure to last up to 14 days on average. Here are some features of the USpicy® ÉCLAIR USND-0901 Professional UV Nail Dryer(White, 9W) that was sent to me for review:

- This lamp can be used with various kinds of nail beauty products, such as UV Top Coat, UV Builder Gel, etc. Work without brand requirements on nail polish
- The wavelength is visible and harmless to eyes. But we do not recommend you stare at the bulb for a long time
- Over voltage & current surge protection- 
Heat-exhausted chip to increase reliability and life span of the nail dryer
- All in one - disinfection & drying.
- Suitable for both professional and personal finger nail care uses
- Small and cool design, compact & easy to operate


Before I could test out this lamp I had to purchase some gel polish. I searched high and low in my area for some but to no avail. I ended up purchasing my gel polish online and went with the brand Gelish as it is one I've heard nothing but great things about. Unfortunately, I didn't realize that the glitter color I purchased wasn't as dense as I expected so I did end up layering it. 


I prepped me nails according to the directions on the Sally's Beauty website for Gelish. Prepping of the nail bed is extremely important when it comes to gel manicures as it is the first step to ensure that the gel properly adheres to your nails. Here are the steps on how to prep:
1. Apply Gelish Cleanser to lint-free wipe (I used Zoya Remove + for this instead).
2. Push back cuticle and clean the surrounding nail. 
3. Shape natural nail. 
4. Gently remove the shine on the natural nail with a cushion file. 
5. Use the Gelish Cleanser on the lint free wipe to clean the nail and remove excess debris.


Now here's the fun part! I applied one thin layer of the Gelish Foundation Gel and cured it under the light for 2 minutes. I used the timer on my phone to make sure I didn't "over or undercook" my nails. When you cure gel nails you are left with a tacky residue. This is called the inhibitive layer and is easily removed with alcohol and a lint-free wipe. This step is usually done at the very end of the gel manicure but since I was using regular polish as well, I didn't want the tackiness to contaminate my Zoya polish and gave my nails a swipe with alcohol.


After removing the tacky layer, I applied two coats of Zoya Noot. Once that dried, I applied my Gelish color which is called Emerald Sparkle. It is a scattered holo glitter that is mostly emerald, very pretty! I cured Emerald Sparkle for 2 minutes then applied Gelish Top It Off and cured that for 2 minutes. I swiped my nails with alcohol and was done with my manicure. 


I was pleasantly surprised how well this lamp worked because Gelish usually calls for a 36 watt lamp. 9 watts meant I had to keep my hand in there a bit longer but not long enough to complain about. My full manicure was completed and 100% dry in 10 minutes. The U-Spicy 9 watt lamp is not only portable and effective, it is an absolute steal at $17.95! I have experience with three other UV lamps and I would definitely pick this one over the others because of how effective it is. If you are interested in purchasing the USpicy® ÉCLAIR USND-0901 Professional UV Nail Dryer(White, 9W) you can find it by clicking this link. As always, I hope you enjoyed this post my dear Lacquer Luvers and look forward to sharing my next post with you, xo! 

~Jessica

**This UV lamp was sent to me for my honest review. **

Saturday, August 31, 2013

Zoya Cashmeres For Fall 2013

Hello Lacquer Luvers! I have some swatch photos and a review today of the Zoya Cashmeres Collection. This collection consists of 6 color saturated creams that are sure to be a perfect fit to your fall wardrobe. 


First up is Flynn. Flynn is described as a lush camel brown nude cream. This is indeed a gorgeous nude for my skintone. It would be such a great base for nail art as well. Sadly, the formula was a bit thin and runny which led to cuticle flooding. Here she is in 3 coats to reach complete opacity.


Next is Louise, which is described as rich chocolate brown cream - color you can just dive into. And dive into it you will! This brown is seriously close to looking like melted chocolate on your nails. I'm sure we all agree it gets no better than chocolate and nail polish, right? This is two easy coats. Yum!


Hunter is described best as a dark sea green cream. The formula on this one was fantastic and it only took 2 coats to be completely opaque. Of all the greens in my collection (& you all know I have plenty!) I don't think I have another one that is quite this shade. Such a gorgeous green!


Next in line we have Sailor. Sailor is described as a classic dark navy. If carefully applied you could probably get away with one coat when it comes to Sailor but I used two for photo purposes. I instantly fell in love with this beauty! I normally don't gravitate to dark shades but I love that this navy made my fingers appear a bit longer.


Zoya Pepper is described as a brick red cream and was originally designed for Peter Som's autumn/winter 2013 collection. Pepper is a shade that I would never pick up if I were in a store. After applying two easy coats I was completely head over heels for this color! It is right in between red and brown and is looks absolutely divine on the nail. 


Last but not least, here is Zoya Livingston. If you are a red lover you are in luck because this one is truly haute! She is described as a lush autumn red. Livingston has a great formula and only needed two coats to reach complete opacity. 

Overall, I would have to say the Zoya Cashmeres Collections is a well put together group of colors. Although none of them are overly unique, they are indeed perfect for fall and will be nice accompanied by your favorite comfy sweater. With the exception of Flynn, the formulas were all nice and really color saturated. My favorites are Louise, Sailor & Pepper. The Cashmeres Collection can be purchased at Zoya.com and retail for $8 each or $48 for the set. Which of these will you be picking up? As always, I hope you all enjoyed this post my dear Lacquer Luvers and I look forward to sharing my next post with you, xo!

~Jessica

***THIS COLLECTION WAS SENT TO ME FOR MY HONEST REVIEW. ***


Saturday, August 24, 2013

Zoya Fall 2013 PixieDust Collection

Hello Lacquer Luvers! This fall the fairies over at Zoya bring us their third PixieDust Collection. The PixieDust line of polishes is compromised of a revolutionary textured matte formula that sparkles. I have been loving the past two collections and am excited to share photos of the beauties that are set to make a dazzling impression with your fall wardrobe!


First up, Tomoko:


Tomoko is described as a romantic champagne silver. This beauty looks like luxurious crushed diamonds on my nails! Absolutely stunning and just two coats to reach full opacity.

Chita: 


Chita is described as a forest green with sparkling matte texture. The formula was amazing and application was effortless. This color just screams fall! (2 coats)

Sunshine:


Sunshine is described as a "Van Gogh" navy blue. I swatched this one last and did not want to ever take it off!!! This is two coats for photo purposes but if carefully applied this beauty can be a one coater. She's a lot deeper than what my photo shows but, as you can see in the macro shot, sunshine really brought out the sparkle in Sunshine.

Dhara: 


Dhara is described as a fiery orange copper with a sparkling matte texture. I love how juicy this one looks! It has a squishy jelly look to it that made her really stand out amongst the others in this collection. (3 coats)

Arabella:


Arabella is described as a rich fuchsia pink with matte sparkling texture. This is two coats and is a truly gorgeous.

Carter:


Carter is described as a royal purple with sparkling matte texture. The pictures pretty much speak for themselves with this one don't they? I mean..that gorgeous shade of purple AND purple glitter?! Love, love, love!!

Overall, I'm really impressed with this collection and have to say that out of all the lines with textured polishes Zoya really does kick it up ten notches with the sparkle factor. My favorites would have to be Dhara, Sunshine & Carter. What are yours? You can purchase the Zoya Fall Pixie Dust polishes on their website, zoya.com, for $9 each or $54 for the set. As always, I hope you enjoyed this post my dear Lacquer Luvers and I look forward to sharing my next post with you, xo!

~Jessica

**These polishes were sent to me for my honest review.**


Tuesday, August 20, 2013

OMG Nail Strips Review!

Hello Lacquer Luvers! I was contacted and kindly asked to review a brand new line of nail stickers by OMG Nail Strips. This company offers a fun array of easy to apply nail strips that are very convenient when you are in a time crunch and want some cool nail art on your  nails. The designs are very unique and the strips are inexpensive, making it even more appealing to try them. I chose to review the Sneaker Nail Polish Strips & Love Nail Polish Strips. Let's have a look at them!


I have tried nail strips/stickers/appliques a few times and was a little worried about application issues as I have personally had problems with wrinkling and sizing before. I wanted to give you a review that was 100% honest so I took the time to photograph each step for you all to see in the photo collage above (start in the top left corner and work your around the center photo). To apply OMG Nail Strips simply follow these instructions:


  • Soak your hands in warm water for 5 minutes. Dry hands, then gently push back cuticles. Carefully remove any excess skin around the nail bed.
  • Moisturize your hands with lotion, and wait 1 minute.
  • Using a Q-tip, remove any leftover lotion from the nail bed, paying special attention to the sidewalls, cuticle area and tip of the fingernail.
  • Select the appropriate sized nail strip for each nail to ensure the nail will be covered from sidewall to sidewall. Using a nail strip that is too large for a particular nail is not recommended; rather, trim the strip the scissors to the appropriate width.
  • Peel off the clear coating, and then carefully remove the nail polish strip from the sticker backing,
  • Start by placing whichever end on the nail strip that works better for your nails at the cuticle and  apply it by smoother the strip towards the tip and your nail, smoothing out and bumps and ensuring the strip is tucked neatly into the sidewalls.
  • File away any excess nail strip by holding your nail file parallel to the surface you are working on, as filing the nail perpendicularly will cause tearing along the tip.
  • After you have applied all ten polish strips, take a cotton ball the has been dipped in polish removed with the excess remover wrung out, and swipe each nail 1-3 times, paying special attention to the sidewalls, tips and cuticle area. This step is especially important, as it melts the strip to your nails, allowing for longer lasting wear.
  • Apply a finishing topcoat, and wait 5 minutes for it to dry completely.


Unfortunately, my fast drying topcoat cracked the sneaker nail strips a bit. I still liked them though and wore them overnight. I was soooo anxious to try the Love Nail Strips so I went ahead and applied those but skipped the topcoat this time.


I love this design so much! Not only that, but you all know that it is my favorite color combination and they applied really nicely! There were some larger strips that can be used for a pedicure later.


Overall, I would say that OMG Nail Strips are pretty neat and versatile in that they come in a variety of designs and sizes. I did have some wrinkling and cracking the first time I used them but that could've very well have been user error as the second time around I had no issues at all with them. OMG Nail Stickers are currently offering a 4 for $20 promotion with the coupon code "4PACK" & 10 for $45 with coupon code "10PACK". You can find OMG Nail Strips on Facebook and Instagram (@omgnailstrips) so be sure to check them out! Shipping is always FREE, too! As always, I hope you all enjoyed this post my dear Lacquer Luvers and I look forward to sharing my next post with you, xo!

~Jessica

Sunday, June 2, 2013

Getting Pretty With Jamberry!

Hello Lacquer Luvers! Have you ever wanted to get amazing nail art on your nails without spending tons at the salon? Have you tried nail art yourself only to find that it's a lot harder than you thought? Well today I have the answer for you! Jamberry nail wraps are a DIY at home application with a wide variety of designs and are perfect for adorning your fingers in style.


The above photo shows a few of the designs that Jamberry has to offer. They range from simple and sophisticated to down right fun! One of the coolest things about Jamberry is that they offer totally customizable wraps that you can order by simply uploading your own images. Cool, right?!


The application of these wraps was incredibly simple and fast. Once you choose the design, simply clean your unpolished nails with alcohol and match your nail to the wrap that fits it best. Next, you peel off the wrap and use a blow dryer to warm it for about 10-15 seconds (this will make the wrap more flexible & the application smoother). Once warm, apply the wrap to your nail using firm pressure around the edges and cuticle. Trim remaining wrap with scissors and file off excess for a smooth edge. Use heat and pressure again to ensure the wrap is adhered to the nail and you're done!


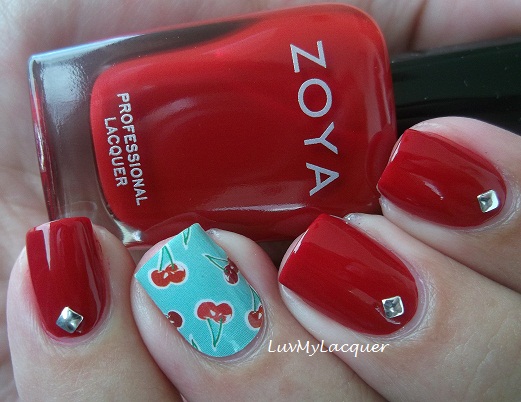
The wraps I used in this post are called Sour Cherry Pie and Red Eclipse. Sour Cherry Pie is such a fun design and I thought this would be a great look for summer! Red Eclipse is sophisticated and classy and would be perfect for professionals who want something different but still work appropriate.


The removal of these wraps are easy as well. Jamberry has 2 removal processes that help you safely remove these wraps from your natural nails. The quick removal process requires using a blow dryer for 10-15 seconds then using your thumb nail to break the seal of the adhesive with the nail & peel off the wrap. The second is the gentle removal process which requires soaking your nails for 30 seconds in polish remover then sliding the wraps off your nail bed. I personally used the gentle removal process.


Overall, I really loved wearing these! I've tried a few kinds of nail wraps before and none ever applied as perfectly for me as these. I'm prone to lots of wrinkling with wraps and Jamberry's were nice and smooth. I love that this company offers such a huge variety of designs and keeps options endless with their customizable wraps! I mean, seriously, the options are endless...high school/college mascot, photos of loved ones, your favorite character for themed birthday parties, just to name a few!


You can purchase these wraps from Jamberry by clicking here. My friend, Shea, is a consultant for Jamberry and there is an ongoing BUY 3 GET 1 FREE promotion on her site so head on over and take a look at all of the beautiful designs she has there! Keep in mind that these wraps have a wide range in size and are totally customizable. As always, I hope you all liked this post my dear Lacquer Luvers and I look forward to sharing my next post with you, xo!

~Jessica

http://www.jamwithshea.jamberrynails.net/
facebook.com/jamwithshea
omgwaitwhatpolishisthat.blogspot.com

Thursday, May 9, 2013

Minnie Mouse Mani & Stamping Plate Review

Hello Lacquer Luvers! Today I have another review and a super cute mani to share with you! For today's mani you will see that I "recycled" part of yesterday's manicure. As I mentioned yesterday, I was sent another item to review from BornPrettyStore, the RuiZ03 stamping plate:


I've always wanted to do a Mickey and Minnie Mouse manicure after seeing Holy Manicures masterpiece a good while ago. Isn't that adorable?! I wanted to do a twist on the normal red/black/white Minnie mani that you normally think of. I was inspired by this picture:


As stated above, I recycled part of yesterday's mani, my ring finger. I removed polish from the rest of my nails and proceeded to begin with a base of Essie Feed Me. I applied two coats of Bettina Vintage to my pinky and middle fingers, 3 coats of Zoya Darcy to my index and 3 coats of L'Oreal Miss Pixie on my thumb. Miss Pixie was a gift from the lovely Keisha of refinedandpolished.com and is part of the Limited Edition Miss Candy collection which includes 8 jellies! Oh, I can't even tell you how excited I was to see that in a very sweet and thoughtful package from her.


The stamping was done with Konad Special Stamping Polish in white along with the images found on stamping plate RuiZ03. I tested these images on paper before applying them to my nails. Each image on the plate is etched perfectly and I had no issues transferring them to my nail art stamper and on to my nails.


I used a makeup sponge and Shimmer Julia on my middle finger. On my thumb I applied one coat of OPI's Pirouette My Whistle followed by another coat of Miss Pixie. I completed my mani with a coat of Essie Good To Go.


This cobalt blue jelly that is Miss Pixie is to die for!

Overall, I really really adore this manicure! It makes me want to start planning a trip to Disney with the kids. I love that it's not your traditional Minnie Mouse colors and the 3D bow went perfectly with my inspiration photo. The RuiZ03 plate from BornPrettyStore is made perfectly and I would definitely recommend it to anybody who isn't great at freehand like myself. Remember that if you do purchase this plate, you can receive 10% off your total order at BornPrettyStore by using the unique code on the right of my blog! As always, I hope you all liked this post my dear Lacquer Luvers and I look forward to sharing my next post with you, xo!

~Jessica