Hello Lacquer Luvers! Have you ever wanted to get amazing nail art on
your nails without spending tons at the salon? Have you tried nail art
yourself only to find that it's a lot harder than you thought? Well
today I have the answer for you! Jamberry nail wraps are a DIY at home
application with a wide variety of designs and are perfect for adorning
your fingers in style.

The above photo shows a few of the designs that Jamberry has to offer. They range from simple and sophisticated to down right fun! One of the coolest things about Jamberry is that they offer totally customizable wraps that you can order by simply uploading your own images. Cool, right?!
The application of these wraps was incredibly simple and fast. Once you choose the design, simply clean your unpolished nails with alcohol and match your nail to the wrap that fits it best. Next, you peel off the wrap and use a blow dryer to warm it for about 10-15 seconds (this will make the wrap more flexible & the application smoother). Once warm, apply the wrap to your nail using firm pressure around the edges and cuticle. Trim remaining wrap with scissors and file off excess for a smooth edge. Use heat and pressure again to ensure the wrap is adhered to the nail and you're done!
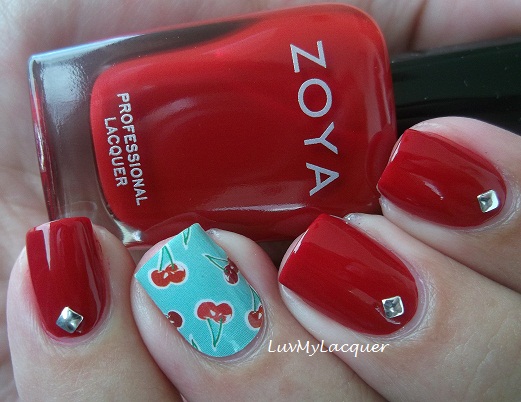
The wraps I used in this post are called Sour Cherry Pie and Red Eclipse. Sour Cherry Pie is such a fun design and I thought this would be a great look for summer! Red Eclipse is sophisticated and classy and would be perfect for professionals who want something different but still work appropriate.
The removal of these wraps are easy as well. Jamberry has 2 removal processes that help you safely remove these wraps from your natural nails. The quick removal process requires using a blow dryer for 10-15 seconds then using your thumb nail to break the seal of the adhesive with the nail & peel off the wrap. The second is the gentle removal process which requires soaking your nails for 30 seconds in polish remover then sliding the wraps off your nail bed. I personally used the gentle removal process.
Overall, I really loved wearing these! I've tried a few kinds of nail wraps before and none ever applied as perfectly for me as these. I'm prone to lots of wrinkling with wraps and Jamberry's were nice and smooth. I love that this company offers such a huge variety of designs and keeps options endless with their customizable wraps! I mean, seriously, the options are endless...high school/college mascot, photos of loved ones, your favorite character for themed birthday parties, just to name a few!
You can purchase these wraps from Jamberry by clicking here. My friend, Shea, is a consultant for Jamberry and there is an ongoing BUY 3 GET 1 FREE promotion on her site so head on over and take a look at all of the beautiful designs she has there! Keep in mind that these wraps have a wide range in size and are totally customizable. As always, I hope you all liked this post my dear Lacquer Luvers and I look forward to sharing my next post with you, xo!
~Jessica
http://www.jamwithshea.jamberrynails.net/
facebook.com/jamwithshea
omgwaitwhatpolishisthat.blogspot.com


Love it! And I really like Jamberry :)
ReplyDeleteI loooooooooooove you and your nails! <3
ReplyDeleteLove the nails. My only fault with Jamberry is that one has to use a blow dryer to get the stickers to stick on the nail..
ReplyDeleteI want stickers because they should be used anywhere - like cars or travel. Where a blow dryer is not handy. You know what I mean?
What an awesome post Jessica. I learned so much! I can't wait to check out the Jamberry nail stickers. They look beautiful! That is so cool that they can be customized.My nine year old is way in to Lego Ninjago right now. How cool would it be to surprise him by wearing Ninjago stickers!! Thank you again for all the helpful information!
ReplyDeleteXXOOO, Teresa